
Well, hello, fellow apartment dwellers with no in-unit washer and dryer! Whether you’re sick of trekking to the laundromat or tired of feeding quarters to the machines in your apartment laundry room—this post is for you.
Below, I will show you how I wash clothes in the sink without detergent!
What You’ll Need
- A deep kitchen sink, a bathtub, or a deep bucket or storage bin
- Electric kettle
- Thick dish gloves (I use these)
- Dish soap or detergent (I use dish soap, and it works great!)
- GAMECHANGER: Portable spin dryer
- Clothesline, clothes rack, or a balcony, banister, or door (any surface area to hang dry clothes works fine!)
Caveats
Everyone thinks washing laundry by hand is hard; I actually don’t think it is. The washing part is EASY. It’s the DRYING part that’s hard because you have to WRING the water out of the sopping wet clothes before you hang dry them; otherwise it’ll take daysss in a humid climate for them to dry. Plus, you’ll get water everywhere.
So don’t worry about buying a portable washing machine. What you NEED is a portable spin drying machine! It’s a serious gamechanger.
Let’s talk hygiene: Is doing laundry by hand going to kill as many germs as doing it in a washing machine? Yes. what matters is water TEMPERATURE. Also, it helps if you can throw it into a dryer because, again, the TEMPERATURE is what kills many pathogens, including dust mites. But, most people (especially in Europe) don’t even have access to a heated dryer. They just using washing machines, and they’re fine, right? So, I emphasize the need to get the water HOT. Not all clothing fabrics can handle high heat, though, so be sure to read the care labels.
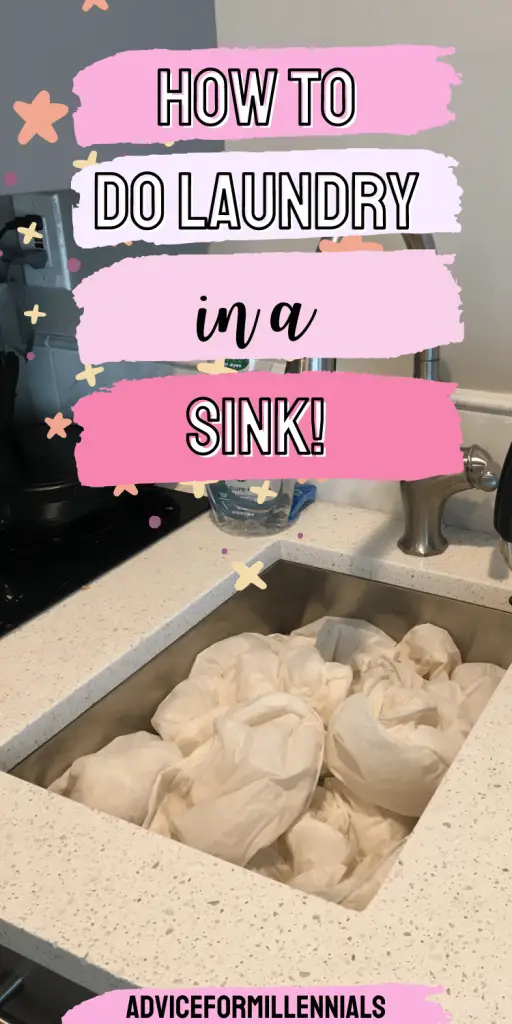
How to Do Laundry in an Apartment with No Washer and Dryer
Step 1: Place dirty clothes into the large container.
Sort dirty clothes and dump them into a deep container (bathtub, kitchen sink, bucket, etc.). Make sure to fill it up no more than 1/3 of the depth.
Step 2: Add soap/detergent and fill the container with HOT water (if the clothes can handle it).
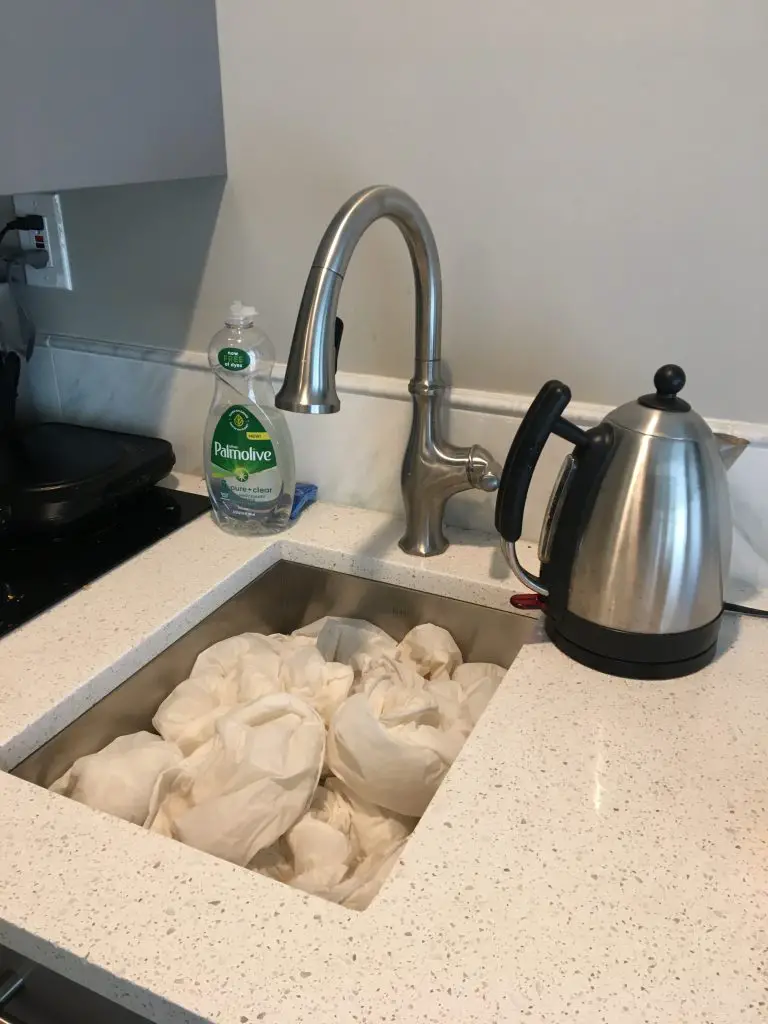
I don’t use laundry detergent in the sink. I actually use Palmolive dish soap and just squirt it a couple of times. If you use laundry detergent, use only a little. It’s much harder to wash out than dish soap.
After you’ve added soap, fill the sink with hot water (if your clothes can handle it). The reason I say it must be hot (the hottest setting) is strictly for hygiene reasons. Certain pathogens—such as dust mites, viruses, and lice—can be killed with high heat. If you are NOT going to be putting your clothes into a heated dryer, then you NEED to heat them with the water.
Here’s what I do: I use the hottest setting in my kitchen faucet. But because that’s not hot enough, I boil water in an electric kettle and mix that in with the hot faucet water.
Step 3: Agitate by hand.
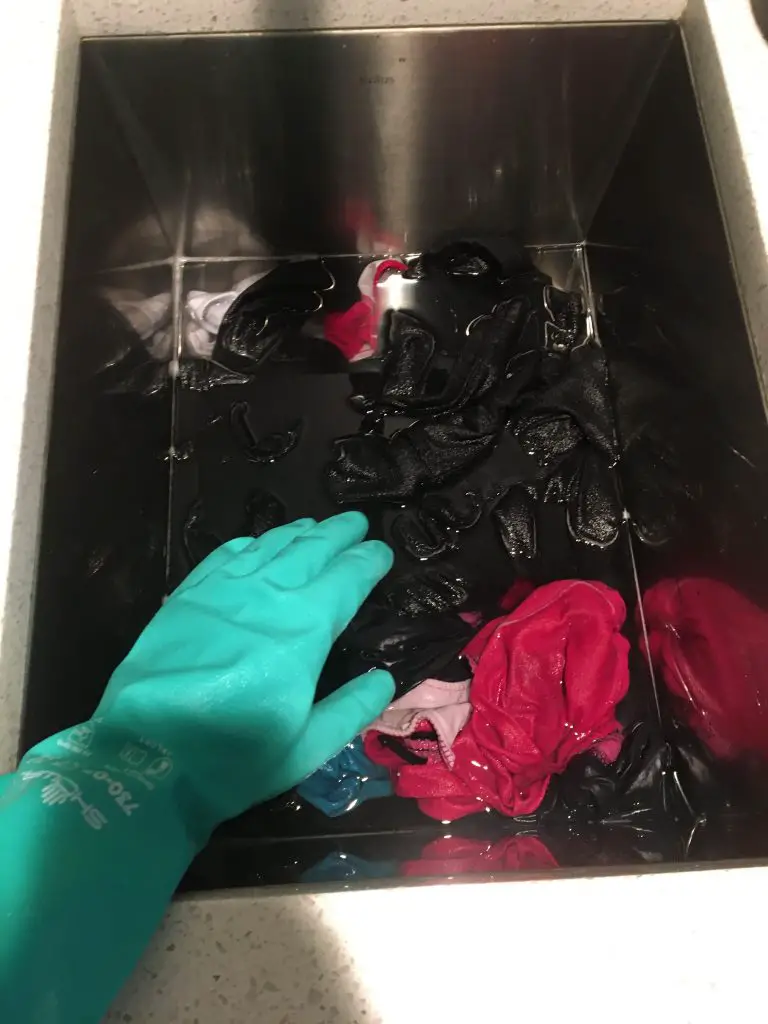
A washing machine agitates the clothes by spinning them—that’s how dirt breaks loose. So, you need to agitate the clothes with your hands. This is where the dish gloves come in handy (because the water is HOT).
Instead of spinning, I usually stick my hands in and kind of massage the clothes and smack them around.
Step 4: Let it soak for at least 15 minutes.
Set a timer for 15 minutes and let the clothes soak. This allows the dirt to really come loose and lets the hot water kill the pathogens.
Step 5: Agitate again.
Come back, put your dish gloves on, and agitate the clothes again to break loose any remaining dirt.
Step 6: Drain and rinse.
Unplug the sink and let all the water drain out. Now, run some cool water over the clothes to rinse them. Next, plug the sink drain again and fill the sink with cool water.
Step 7: Agitate and drain and rinse again
At this point, the water in the sink should be cleaner than before BUT it probably still has some dirt and suds. Just keep agitating, draining, and rinsing until the water in the sink is pretty clear. Remember, it will probably never be 100% clear because, especially if you have dark clothes, some of the lint inevitably breaks free and makes the water look a little dark.
Step 8: Drain the container and put the wet clothes into the laundry spinner
Now, drain the sink. Do NOT worry about wringing the clothes if you have a laundry spinner. The laundry spinner is literally made to handle sopping wet clothes. It’ll do the wringing for you! And trust me, it does a much better job. The clothes should be nearly dry by the time the spinner is done.
This is a gamechanger:

Step 9: Hang the clothes to dry completely
Take the clothes out of the spinner and hang them to dry. I’m so cheap I don’t even own a clothes rack or clothesline. I just hang them over my shower door and over the banisters of my stairs. It works!